Jumper cables are indispensable tools for every driver, especially during emergencies when your car battery decides to take a break. While jump-starting a vehicle is a straightforward process, disconnecting jumper cables requires equal attention to ensure safety and prevent damage to your vehicle. In this comprehensive guide, we’ll walk you through the step-by-step process of disconnecting jumper cables safely and efficiently.
How to Remove Jumper Cables?
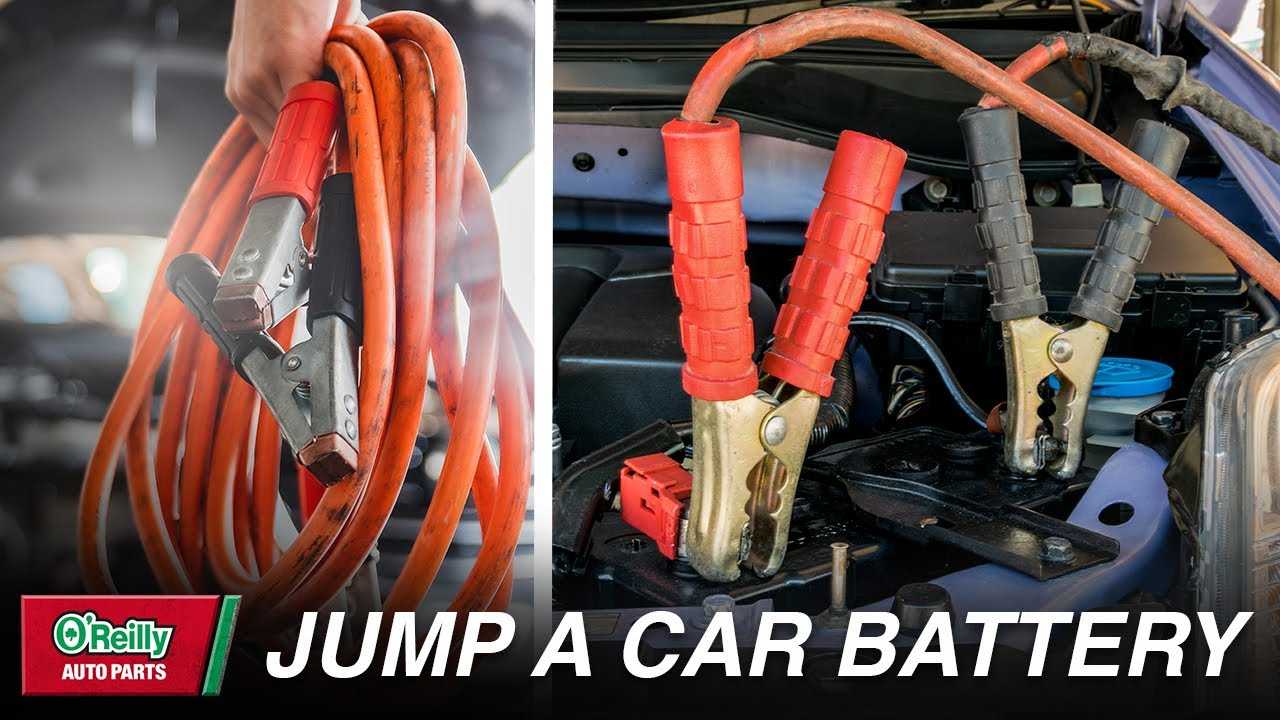
Understanding Jumper Cables: Before diving into the disconnection process, it’s crucial to understand the components of jumper cables. Typically, jumper cables consist of two insulated cables with alligator clips on each end. One cable is usually red (positive), and the other is black (negative). These cables are used to transfer electrical current from a functional battery to a dead battery, jump-starting the vehicle.
Safety Precautions: Safety should always be the top priority when dealing with jumper cables. Before disconnecting them, take the following precautions:
- Ensure both vehicles are turned off: Before disconnecting the jumper cables, turn off the engines of both vehicles to prevent electrical accidents or damage to the electrical systems.
- Allow the vehicles to cool down: If either vehicle has been running for an extended period, allow them to cool down before disconnecting the jumper cables to avoid any risk of burns or other injuries.
- Inspect the cables for damage: Before disconnecting the cables, visually inspect them for any signs of wear, fraying, or damage. Damaged cables should not be used and must be replaced immediately to prevent electrical hazards.

How to Take Off Jumper Cables?
Step-by-Step Guide to Disconnecting Jumper Cables: Now that we’ve covered the essential safety precautions, let’s proceed with the step-by-step process of disconnecting jumper cables:
Step 1: Turn off both vehicles. After successfully jump-starting your vehicle, turn off the engines of both vehicles to prepare for the disconnection process. This step is crucial to prevent any electrical mishaps.
Step 2: Identify the positive and negative terminals. Identify the positive (+) and negative (-) terminals on both batteries. The positive terminal is typically marked with a plus sign (+) and is usually red, while the negative terminal is marked with a minus sign (-) and is often black.
Step 3: Remove the negative cable from the recipient vehicle. Begin by removing the negative (-) cable from the recipient vehicle’s battery. Carefully unclip the black alligator clip from the negative terminal of the recipient vehicle’s battery. Ensure that the metal clamps do not touch any metal surfaces to avoid sparking.
Step 4: Remove the negative cable from the donor vehicle. Next, remove the black (-) cable from the donor vehicle’s battery. Again, unclip the black alligator clip from the negative terminal of the donor vehicle’s battery, ensuring that it does not make contact with any metal surfaces.
Step 5: Remove the positive cable from the recipient vehicle. After removing the negative cables, proceed to remove the positive (+) cable from the recipient vehicle’s battery. Carefully unclip the red alligator clip from the positive terminal of the recipient vehicle’s battery, ensuring that it does not touch any metal surfaces.
Step 6: Remove the positive cable from the donor vehicle. Finally, remove the red (+) cable from the donor vehicle’s battery. Unclip the red alligator clip from the positive terminal of the donor vehicle’s battery, ensuring that it does not make contact with any metal surfaces.
Step 7: Store the jumper cables properly. Once all the cables are disconnected, carefully coil the jumper cables and store them in a safe place in your vehicle. Avoid tangling the cables to ensure easy access and usability in future emergencies.
Conclusion:
Disconnecting jumper cables safely is a crucial skill that every driver should master. By following the step-by-step guide outlined above and prioritizing safety precautions, you can ensure a smooth and hazard-free disconnection process. Remember always to turn off both vehicles, identify the positive and negative terminals correctly, and remove the cables in the specified order to prevent any electrical mishaps or damage to your vehicle. With these precautions in mind, you can confidently handle jumper cables and navigate emergency situations with ease.